an adventure into my cookbook collection: soul-searching, doing things differently & the truths I learn along the way...

deseeding pomegranates is feminine & erotic, unless you hit them with a wooden spoon...

urm..?
Showing posts with label mezze. Show all posts

Sunday, 19 June 2016

Pea, avocado and mint dip

Bright green, summery, fresh, and kind of healthy-ish.

Serves around 6 as part of a mezze (mezze is probably the best kind of meal).

Ingredients
2 cups green peas – I use frozen garden peas, which I prefer to petit pois, but it is up to you I suppose. Some broad beans would probably work too, but I don’t like them
1 ripe avocado, preferably the crocodile-textured hass variety.
1 small or ½ a large clove or garlic
1 tbsp crème fraîche, or cream cheese, or ricotta. Or leave out.
Juice of ½ a lemon
6 leaves of fresh mint or a generous tsp of dried mint. (I used dried as I didn’t have any fresh, and it worked really well.
½ tsp each of mustard seeds, sumac, ground coriander, and chilli flakes
salt and pepper

Method

Defrost the peas if you need to. Blend everything together with half the mint and lemon juice, and a little bit of salt and pepper. Taste and add more mint, lemon, salt and pepper as needed. If you like your dips with texture then you can add some finely chopped spring onion, shallot or radish once it has been blended.


Tuesday, 14 June 2016

Carrot Tzatziki

This is based on something I had in Turkey a couple of years ago. Everything I ate in that trip was very simple, earnest and vegetarian, but just so delicious. Good quality veggies, and a generous amount of olive oil and garlic had a lot to do with it. And also the fact that it was holiday – everything tastes better on holiday.

I had never really thought that plain yogurt could be delicious until I went to Turkey. I always thought it was just plain yogurt. One way to recreate this back in the UK is to buy Middle Eastern brands of yogurt, or at least to buy full-fat yogurt instead of low or fat free. It is amazing how much difference full fat makes to the flavour (and I think the jury is out on how much it could really impact your waistline).

Obviously there is nothing wrong with regular tzatziki, its just that sometimes there are carrots that need using up, and it is good to ring the changes every once in a while. It is definitely better with fresh garlic, but if you want a more ‘social’ version, use garlic powder for a subtler garlic-y hum.

Serve this as part of a mezze, or with whatever you would usually use tzatziki for.  When I made it, I ate it with shakshuka and dukkah, and it was very delicious. There is no photo unfortunately – the lighting wasn’t quite right, so the gorgeous orange, gold and white-flecked tzatziki looked not so luscious, more nauseous.

Makes a generous mezze bowl for 4 – 6 people

Ingredients
1 medium sized carrot, grated (only peel if it really needs it)
300g greek yogurt, preferably full fat
1 clove crushed garlic, or 1 tsp garlic powder
Pinch of salt
½ tsp dried mint (use fresh if you have a glut of it in the garden, but dried I think works better for this)
1 generous tbsp of extra-virgin olive oil

Method

Squeeze the grated carrot a bit to get some of the excess liquid out. Then simply mix everything together. If using fresh garlic, I would advise making it at least an hour before you are ready to serve, to allow the flavours to start to relax and develop.


I ate it with warm tortillas and dukkah – very delicious.

Pomegranate, tomato and herb salad

This tastes like proper Israeli falafel stand/kebab shop salad, and I mean that in a very good way.

Ingredients
½ cucumber, finely diced
1 pomegranate, de-seeded (save some of the seeds for scattering over everything later)
Bunch parsley
1/2 bunch mint
1-2 (depending on size) echalion or banana shallots
3-4 medium vine tomatoes seeds removed
1-2 tbsp Pomegranate molasses
1-2 tbsp Olive oil
2 tsp sumac
Salt and pepper

Method


De-seed the pomegranate, finely dice all of the veggies and roughly chop the herbs. Lightly dress with 1 tbsp each of olive oil and pomegranate molasses, and half the sumac. Season with salt and pepper. Let it sit for a bit before serving, around 10-20 minutes or so. Drizzle the remaining olive oil, pomegranate molasses and sumac over the top before serving. Fresh coriander and some finely diced red or green pepper is good in it too (if you like it).

Tuesday, 16 September 2014

Romesco sauce


This is a Spanish (my version Spanish-ish) dip/sauce thing, made with roasted pepper, tomato, garlic and walnuts. You could use other nuts, but I like the slightly bitter edge you get from the walnuts.

Romesco sauce works incredibly well as an accompaniment to some simply grilled or pan-fried fish, and I really love it with sweet potato wedges too, or on a bit of nice bread, or on a spoon. Basically, it is delicious.

Rachel Khoo made one and served it with burnt leeks, which had been steamed in newspaper. That sounded like the kind of bonkers thing I like to do, so I gave it a go – and I thought the leeks were horrible. If you like your sauce-accompaniments oniony and stringy, let me know and I’ll give you the directions.

This recipe is based on recipes by Rick Stein and Rachel Khoo. This amount makes approximately 6 dainty servings. More if you are less dainty, like me.

Ingredients

Pinch chilli flakes or 1 dried birds eye chilli
2 medium/large tomatoes, sliced in half
2 red peppers, slice in half and remove the seeds and white pithy bits
3-4 cloves of garlic, unpeeled
30g walnuts - or hazelnuts or almonds, toasted and skins crumbled off (half-heartedly is fine)
20g stale-ish nice bread – no crusts
100ml olive oil
1 ½ tbsp red wine/sherry vinegar
Salt and freshly ground black pepper

Method

Pre-heat the oven to 180-200 degrees (I’m not sure exactly because my oven only has three temperatures: very hot, hot, slightly less hot).

On a baking tray, arrange the tomatoes and peppers cut side down. Hide the garlic cloves under the pepper shells to prevent them becoming too scorched (this does work). Roast (no oil needed) for 15-20 minutes, until the vegetables are fragrant and the skins have blistered and blackened in places.

Pinch off as much of the burnt pepper and tomato skin as you can, and peel the garlic cloves. Put the roasted veggies and garlic in a food processor with the chilli flakes, toasted walnuts and bread. Pulse to chop, and the slowly drizzle in the olive oil as you blend until you get a rough sauce-y consistency. Add a generous pinch of salt and grind of pepper and the vinegar, blend, and then taste to see if it needs more seasoning or more vinegar.

Monday, 17 March 2014

Homemade labneh with parsley and pistachios


Someone once said ‘blessed are the cheesemakers’ and I think they had a point.*

When I was in Italy in the autumn we went to visit an artisan cheese factory somewhere in Umbria. It was all a bit stinky and damp, but the cheese was phenomenal.

Here is a way to make the super delicious Middle-Eastern yogurt-cheese labneh. It is also a bit damp, but not stinky. Much much love to Shana for showing me the way, and for the use of the genuine Australian cheesecloth.

To make approximately 500g of labneh you will need:

1 kg natural yogurt (low fat is fine)
Cheesecloth/muslin
A big bowl

To make the labneh exciting and delicious you will need:

Extra virgin olive oil
salt
½ clove garlic, crushed (optional)
Big handful fresh parsley, finely chopped
Handful pistachios, chopped
1 tsp sumac
Lemon juice

Method
  
Fold the cheesecloth in half and drape it over the big bowl. Pour the yogurt into the cheesecloth, gather the edges together, and knot or tie with elastic bands. Liquid will immediately start seeping through the cheesecloth. Hang the ball of yogurt so that it can drip freely, and leave overnight. 


Note the ingenious use of cupboard handle to hang cheesecloth
The following morning, untie the cheesecloth and scrape the thickened yogurt-cheese into a container.  Add a generous pinch of salt and a drizzle of olive oil, and mix well. At this stage you could also add a bit of garlic if using, some sumac, or any other nice spice. Refrigerate until ready to serve.

Before serving, stir through some fresh parsley and sumac, and scatter with the pistachios, and some more parsley. Drizzle with olive oil and lemon juice.

You could also roll the labneh into balls, roll the balls in za’atar or chilli flakes, and store in the fridge in olive oil, which is very nice too.

*Because cheese is amazing. I'm not saying that I am especially blessed by making labneh. 

Tuesday, 11 March 2014

Roasted cauliflower with tahini and date syrup


Dear wonderful followers, occasional readers, and one-off Googlers,

Sorry that things have been a quiet round here. I have been having a bit of a hard time in the part of my life that isn’t to do with food or films. I realised that I completely wear my heart on my sleeve, so I have been trying to keep to myself, to contain any misery. I know it isn’t emotionally healthy, but I have never been very good at following my own advice.

What is interesting is that in spite of all that is going on with me, I have been eating relatively healthily, and doing more exercise than usual. Partly it is because comfort-eating is such a f**king cliché, and partly is that eating well and doing some endorphin-generating activity does actually make me feel better. I never thought I would be the kind of person who sweated voluntarily, but it seems to really work for me. I have been told on a few separate occasions that I have the legs of an athlete, so maybe the rest of my body will catch up soon.

Cauliflowers are for me probably the big fluffy duvet of the vegetable world. This recipe is really delicious, and I have been eating a lot of it lately. It is a bit like a healthier, Ottolenghified cauliflower cheese.

One medium-sized cauliflower will make enough for a mezze dish for up to 4 people. I tend to buy the extra-large cauliflowers wherever possible. I have left the quantities here vague so that you can scale up/down depending on how much you are making.

Ingredients

Cauliflower – separated into florets (ranging in approximate size from walnut-egg).
Olive oil
Sea salt
Tahini sauce (directions on how to make can be seen here. Omit the garlic and add enough liquid to make a good drizzling consistency).
Date syrup
Za’atar

Method

Preheat your oven to 200 c (180 with fan)

Toss the cauliflower florets in olive oil and arrange them in one layer on a baking tray. Grind some salt over them, and roast them for 25-35 minutes, or until cooked through and browned in places. Try not to eat all the pieces straight out of the tray, and let them cool to room temperature.

Arrange the cooled cauliflower on a nice plate (this is very important), and drizzle with tahini in artful swirls. Add an artful swirl of date syrup on top of the tahini (a little goes a long way), and sprinkle some za’atar over the top.

And feel better.


Wednesday, 29 January 2014

Glorious melba toast


Crispy crackers made out of toast, super easy and just wonderful.

Each slice of bread will make 4 pieces of melba toast.

To make, preheat your oven to 180 degrees c.

Get some slices of brown bread, and toast them in a toaster.  Cut the crusts off, and then cut each slice in half horizontally through the middle, so that you have two thin squares of toast, crisp on one side, fluffy on the other. This sounds tricky, but it really isn’t, use a regular bread knife and it will be fine. 

Cut each slice in half diagonally to create two triangles, and arrange all the toasts, fluffy untoasted side up, on a baking tray. Bake for about 15 minutes until completely crisp and curling at the edges.

Leave them to go completely cold until you box them. Serve with smoked mackerel pâté, humous, this amazing pumpkin seed dip, some posh cheese, or whatever else you fancy.

Sorry about the light...


Saturday, 28 December 2013

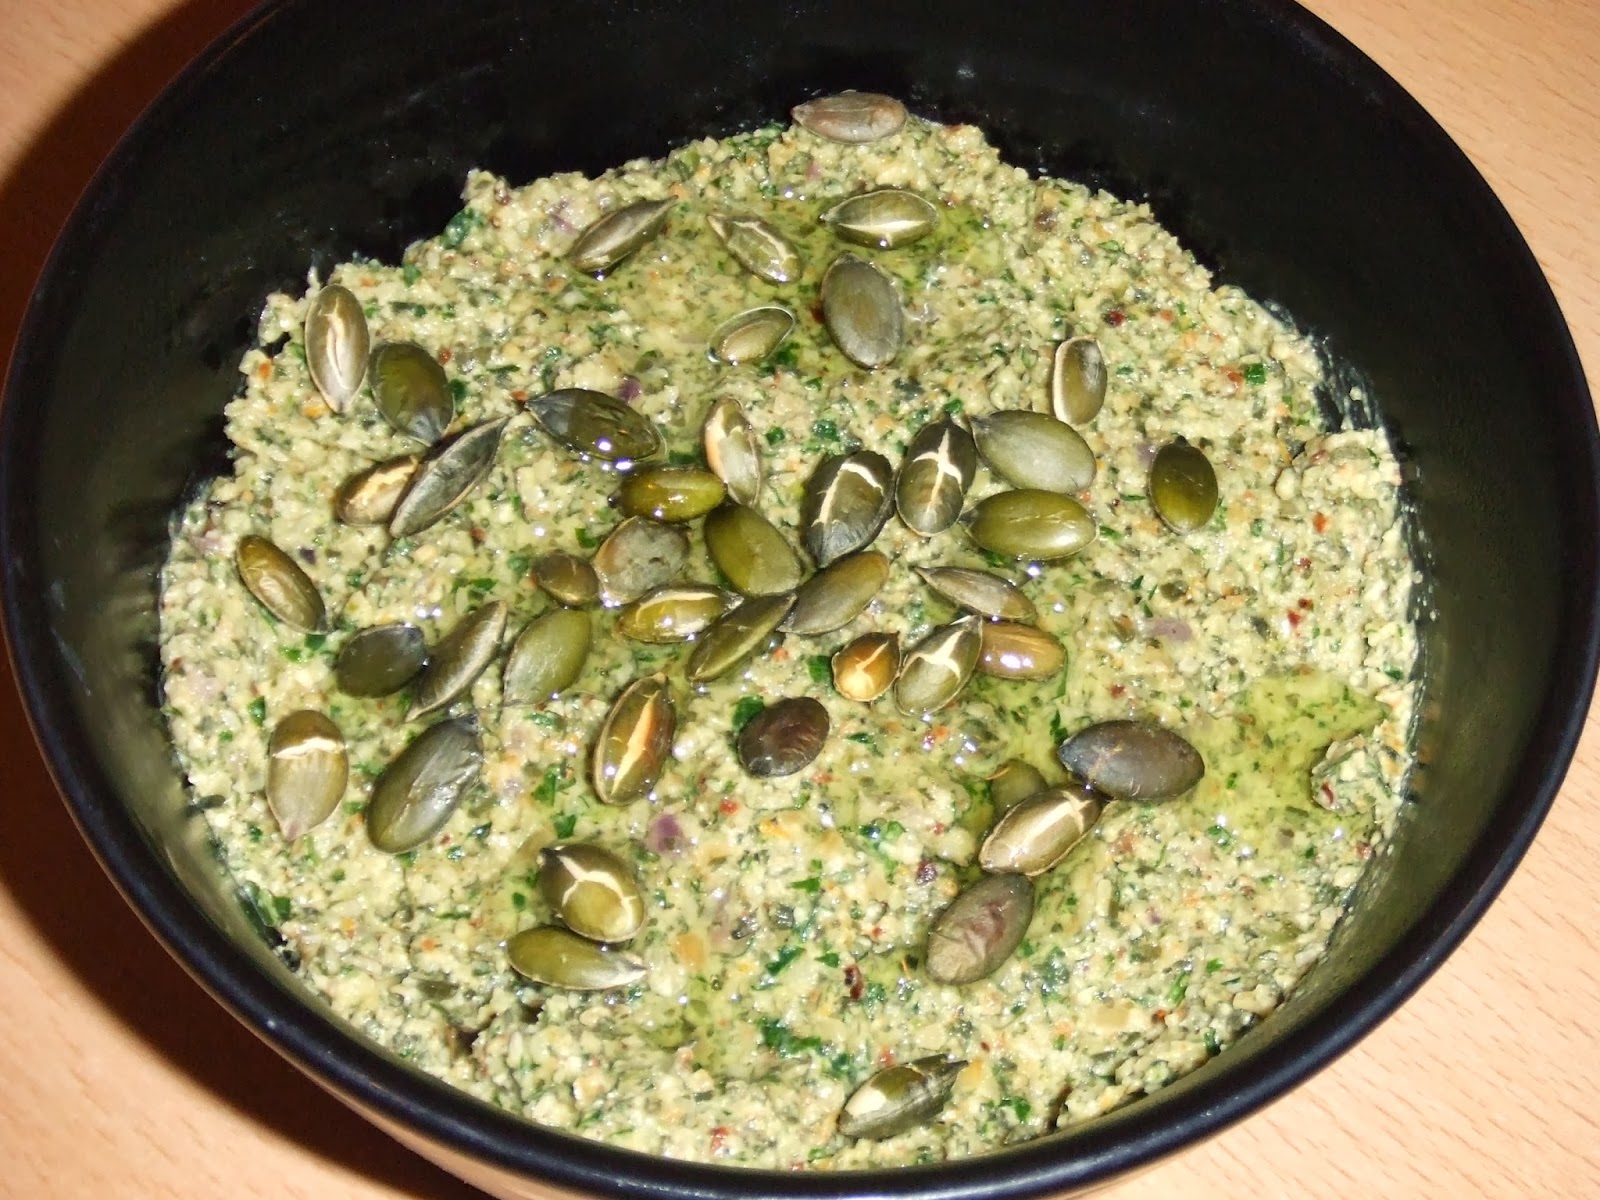
Mayan style toasted pumpkin seed dip


Hello you lovely people! I hope you that you had a wonderful break, however you choose to mark the season (if at all). I marked it by getting a year older, eating a delicious salt-caramel chocolate torte from Babkalicious and attending Limmud conference and learning a lot of new things.

I am one of those weird people who gets oddly excited about kitchen utensils, the bigger the better. My favourite Selfridges window is the one with the display of giant saucepans, and I have confused many people by stopping in my tracks to gaze longingly at it. The flat I am currently living in contains one of the largest frying pans I have ever had the privilege to be able to use, and as soon as I saw it my mind just started fizzing with new recipes to try. It is the perfect size and shape to toast a ton of pumpkin seeds, and so this recipe just had to be made (I get inspired by normal things too, like sunsets and art, I’m not a complete lunatic).

This dip is absolutely delicious, it is simple and just works in that way that ancient and authentic recipes do: toasty, wholesome, citrus-fresh and ever-so-slightly bitter. Toasting pumpkin seeds transforms them in the most wonderful way. They become crunchy and fragrant, with a complex roasted nutty flavour.

The quantities given here make enough for a smallish bowlful, or rather, enough as part of a Mexican/South American mezze-style dip selection for about 6 people. The original recipe uses a food processor, but I decided to use my mortar and pestle, and then an immersion blender. This probably kept the texture a bit rougher, which I liked, and was less complicated for washing-up purposes. But really, I just love using my mortar and pestle – it is rough stone and heavy, and makes me feel a bit more authentic.

Ingredients:

1 cup plus 1 tbsp pumpkin seeds
2 tbsp olive oil
½ onion, finely diced (or use a whole one if it is small)
1 jalapeño, seeds and white pith removed, and finely diced
2 cloves of garlic, crushed
Small handful fresh parsley (equivalent to about 1/3 cup)
Small handful fresh coriander leaves
2 tbsp fresh lime juice
zest of half an orange
salt

Serve: with tortilla chips, crudités, warmed soft tortillas and other South American delicious dippy things like salsa, guacamole, and sour cream.

Method:

Heat a large frying pan and toast the pumpkin seeds in a single layer (no oil), tossing occasionally, until they crackle and pop. Some will jump out of the pan in an over-excited kind of way. You may need to do this in stages if your pan isn’t big enough.  

Saving a few of the seeds for garnish, grind the rest to powder in a pestle and mortar and add to a large bowl. You will definitely need to grind them in stages.

Heat 1 tbsp of the olive oil in the frying pan, add the diced onion and jalapeño, and fry over a medium heat, stirring occasionally. Once it starts getting a little softened and translucent, add the garlic and fry for a few minutes more, and then add to the bowl with the pumpkin seed powder.

Add the parsley, coriander, lime juice, orange zest, 1 tbsp olive oil, pinch of salt, and 1/3 cup of water to the bowl with the ground pumpkin seeds and fried things, and use an immersion blender to puree everything together to a rough, humous-like texture. Taste and add a little more salt if needed.

Serve at room temperature, scattered with the reserved toasted pumpkin seeds and a little drizzle of olive oil.

Wednesday, 13 March 2013

Humous, my way


Most people have their way of making humous – here is mine.

Humous is one of my staples. I really can’t live without it. During Passover when I can’t have it (because I am of Ashkenazi origin), I really suffer. If I marry a Sephardic Jew (presumably a male one) I will be able to eat chickpeas over Passover – it is problematic because I have always said that I don’t need to marry in order to be happy, but chickpeas might actually be the exception to the rule. Seriously, who needs equality and a strong individual identity when you can have humous for an extra week every year?

I started making my own when I was in university because it was cheaper, and I still do because it is so much tastier. I like it thick and lemony, with a little garlic and spices, with marinated chickpeas on the top for variation of texture, fun, and to make it look super impressive. The only drawback to making your own over shop-bought is that home-made humous only lasts for a few days – although in my mind, by highlighting all of the preservatives in the shop bought varieties, it makes me want to eat them even less.

The quantities given below are enough for a mezze of 10 people. See my new mezze label for more recipes.

For the humous:

2.5 cans chickpeas, drained and rinsed (pick through the drained chickpeas and squeeze off as many of their rubbery skins as you can bare. This is time-consuming, but trust me, it makes for a far better humous. I tend to set a time-limit for this, e.g. as many as I can pick off in 15 minutes.)
3 tbsp. runny tahini sauce (made fresh from tahini paste, see method here – I always have some on the go for making humous, baba ganoush, eating with a spoon, and drizzling over roasted fish, aubergines, butternut squash, or whatever else that takes my fancy)
2-3 tbsp. extra virgin olive oil
Juice of 1 lemon, more or less depending on your tastes
2-3 cloves of garlic, crushed (depending on tastes or social plans -  if the cloves are big I tend to use one and a half)
1 tsp. ground cumin
1 tsp. ground coriander
salt to taste

For the marinated chickpeas:

Half a can of chickpeas
1 tbsp. extra virgin olive oil
1 tsp. ground cumin
½ tsp. smoked paprika (or more according to your preferences)
1 tsp. sumac
1 tsp. za’atar
salt to taste

Make the marinated chickpeas in advance if possible, or at least before you start making the rest of the humous. Just put everything in a bowl and mix well.

After the skins are removed place the chickpeas in a large bowl with the other ingredients and blend with a hand-blender until smooth. Using a hand-blender as opposed to a food processor will give you greater control over the consistency of the humous – you want it to be smooth, but not blended into oblivion. You may want to add a little water to create a smoother dip – I like mine almost cementy. Season with salt and taste, adjusting the lemon and spice levels according to your preferences.

Serve with the marinated chickpeas on top of the humous (make a little well in the centre of the dish) and drizzle with a little extra olive oil and za’atar.

So that's how I make my humous - how do you make yours? Please leave me a comment if you have any recommendations for interesting combinations or additions 
*breaking news* see my chocolate hazelnut macaroon recipe for Kosher Kingdom here
Get your early-bird Gefiltefest tickets here

Saturday, 9 March 2013

Tabouleh with Apricots


Tabouleh is one of my favourite salads, and it has been for as long as I can remember. For me, it is magic salad. A friend recently asked on facebook: ‘what food when you eat it today takes you back to your childhood?’ My immediate response was Spaghetti Hoops, but actually, it is tabouleh, known to my childhood self as ‘magic salad.’ When you are little, I guess absorption is a bit hard to comprehend. Even though I now understand that the water covering the bulgur wheat doesn’t magically disappear, the associations of excitement and wonder remain.

As they say in Jerusalem, ‘If you want to find a good husband, you’d better learn how to chop your parsley properly.’

Tabouleh is all about the parsley.  I cook with a lot of parsley, obviously I am just trying to perfect the chopping method. Traditionally tabouleh is mostly herbs with a little bulgur wheat, but my recipe is more similar to my mother’s, which uses a higher ratio of bulgur wheat. This makes the salad a little more substantial and a little less time-consuming (the herbs take ages to pick and shred properly). Also like my mother and unlike the Ottolenghi/ Tamimi recipe, I don’t put any spices in the tabouleh. I use spices in most of my cooking, so it is nice to have a side salad that is really fresh-tasting, to balance with the rest of the meal.

Dried apricot and spring onion tabouleh, serves 6 - 8

Ingredients:

150g bulgur wheat
1-2 cloves of garlic (depending on your social plans for the rest of the day), crushed
Big punch of fresh parsley, about 100 - 150g, leaves picked and chopped (a little stalk is fine)
Fresh mint, about half a small pack 15 – 20g, leaves picked and chopped
3-4 spring onions, finely sliced (greens as well as white)
handful of dried apricots, diced (I buy these ready-diced. It costs the same and they are coated in a little rice flour so that they don’t stick to anything)
2 – 3 tbsp extra-virgin olive oil
juice of half a lemon, more if you want
salt and freshly ground black pepper

Put the bulgur wheat in a heatproof bowl and cover with boiling water as if you were making couscous. Leave for about 10 minutes until most of the water is absorbed and the bulgur wheat is cooked but still al dente. Drain off the excess water and while the bulgur wheat is still warm, add the garlic and olive oil, and season with salt and pepper. Mix in the other ingredients – adding extra lemon juice and olive oil if you want to. Tabouleh gets better over time, and I normally leave it for a day before digging in.


Variations:

Cucumber and tomato (finely diced)
Pomegranate, red onion and crispy fried shallots

Wednesday, 17 October 2012

Baba Ghanoush, my way


Here is another ode to the aubergine. A dip of roasted, smoky aubergine and tahini. When I first came across it, its greyish and lumpy appearance wasn’t the most appealing to be honest, but the taste soon won me over. In The New Book of Middle Eastern Food Claudia Roden describes baba ghanoush as “exciting and vulgarly seductive” – possibly one of the best compliments anything could have. People also make a version with mayonnaise, which I hate with a fiery passion. Somehow it transforms this wonder into a sweet, eggy sort of wallpaper paste.

There are infinite ways to make this, and this one is my favourite. And I really do love it. My flatmate Claudie just asked how long it keeps in the fridge, a perfectly valid question, but the answer is that it never lasts long enough for me to find out. According Jerusalem, there is apparently major disagreement as to whether proper baba should have tahini in it, or just olive oil. I am in the tahini camp.

I wrote in the miso aubergines post that I wasn’t sure how aubergines have become such a symbol of Jewish food – but I have done a tiny bit of research and of course Claudia Roden and Yotam Ottolenghi/ Sami Tamimi provide the answers. Apparently, while aubergines were brought to Spain and Italy by Arabs, Jewish people are credited for introducing them because they took them into the countries when fleeing various aggressors and moving and trading among the Arab Moorish and Christian cultures in the 15th and 16th centuries.

Ottolenghi/Tamimi writes in Jerusalem:

“Few ingredients have reached the level of veneration achieved by the humble aubergine or have found their way to almost every table in Jerusalem. Everybody loved to be associated with the aubergine – it’s like the local celebrity. The number of people who claim to have invented baba ghanoush, or at least elevated it to the level of fine food, is extraordinary.”


Ingredients:

2 aubergines
1-2 cloves garlic, crushed – you can either use these raw, or fry them slowly in olive oil until glossy and sweet
olive oil
tahini sauce** 
ground cumin – freshly toasted and ground if you have the time, this is however one of the few recipes where I give you permission to use the ready-ground
smoked paprika
lemon juice
salt and pepper
handful chopped fresh parsley – optional but very tasty

Turn the oven to 190-200C

Method:

Prick the aubergines all over with a fork or sharp knife. Put them in the oven and bake for at least 45 mins. You can check on them after this time by pressing them gently with a fork or some other non-finger implement – they should have wrinkled and be soft to the touch. Depending on how hot/pre-heated the oven was, this could take a good hour. This would be a lot more authentic by the way if done on a barbeque. I wouldn’t recommend scorching them over a flame on the hob though – however fun it may be to stick a fork in a pepper and burn it over a flame (terrifying flatmates in the process), aubergines are just a bit too big. And the concept of covering your entire hob in foil and just leaving the aubergines on the rings for half an hour sounds a bit much. Leaving them alone in the oven is just easier.

Once the aubergine is soft and a little collapsed, allow it to cool until it can be handled – this is a hands-on messy bit. Putting the aubergines on a large plate or oven tray, carefully peel away the skin, reserving any flesh that comes away with it. Break the aubergine open a little to allow some of the excess water to drain away – you don’t want a watery baba! At this stage I also remove some of the big clumps of seeds – there is hardly any flesh on them and I just don’t think they are that good. Give whatever flesh is left a squeeze or shake to get rid of any remaining water, and chop the whole thing up – so that it goes a little pulpy in parts.

Add the chopped aubergine flesh to a big bowl with the tahini, garlic and parsley if using. Add about ½ teaspoon of cumin and ¼ teaspoon of the smoked paprika, a few spoons of lemon juice, salt and pepper. Mix well and taste, adjusting the different seasonings to your liking. I like it with a lot of lemon, and sometimes also a little bit of hot chilli powder or cayenne pepper.

I love it with pita, quickly warmed in the toaster – so that the edges are a little charred, but it is warm and soft in the middle. Apparently it goes very well with rye crackers too.


** Tahini: I used to buy this in little jars from health food stores or supermarkets, but over the past few years I have become so addicted to it that I now buy it in 1kilo plastic tubs from local Middle-Eastern stores. I use it whenever I make humous, baba, as a dressing for salads, roasted fish or meat, or as a dip in its own right. I always turn it into a sauce first  – when using the paste ‘neat’ it has too cement-y a texture.

To make tahini sauce, put a few tablespoons of tahini in a bowl and add a little water and lemon juice. When you start stirring, the mixture may seize and become grainy, but don’t worry this is normal. Continue adding water and mixing until the sauce becomes creamy. Add more lemon juice to taste along with a little salt, pepper and some garlic. This makes a good salad dressing with a little honey added too. 


*BREAKING GEFILTEFEST NEWS* For next year's festival, there will be two new awards, 'The Gefiltefest Jewish Cookbook Awards'. One will be a public poll for the best English language cookbook, and there will be a panel of expert judges giving a separate award. Any publisher is welcome to submit books relating to any aspect of Jewish food, as long as they are published between May 2012 and May 2013.


Tuesday, 26 June 2012

Courgettes with Sumac, Pine-nuts and Raisins


And here is another one from Claudia, same book as before. Sumac is my new favourite thing – its getting much easier to find too.  If you are the kind of person who puts lemon juice and black pepper on everything, this will be your favourite thing too. Because she is brilliant and knows me so well, Suzy brought me back a big baggie full of the stuff from Israel. This dish is quick and easy, infinitely multipliable and seriously delicious. One to turn even the most staunch courgette-hater. Believe me I should know, I have only been eating them happily for the past 2 years.

This is more than enough for 4-6 people as a salad or veggie side dish.

3 courgettes sliced into rings between 1cm- 5mm thick. Don’t use the really massive ones as they aren’t as tasty.
1 large clove garlic, crushed
2 tsp sumac
1 tbsp raisins
1 tbsp pine nuts
1 tbsp olive oil
Salt
Lemon juice

Heat the oil in a large frying pan and when hot, add the courgettes (medium/hot flame).  Don’t move them around too much, as you want them to colour. When they start to take on a little colour, add the sumac, pine nuts and raisins. After about another 5 minutes, add the garlic. It is done when the courgettes have taken on a lovely charred colour in parts, the raisins are plump and the pine nuts are toasted. Make sure that the garlic doesn’t burn.

Take off the heat and add a little salt. Serve at room temperature, with a little lemon juice squeezed on just before serving.

Saturday, 23 June 2012

Green Herb Eggah


Hands down, I think that Claudia Roden is the best food writer out there. What I love is the importance she places on history, nostalgia and cultural memory. My mother just bought her new book The Food of Spain and so far I have only had a little flick through it, but it looks pretty amazing. This recipe is from the New Book of Middle Eastern Food (1985). I made this to form part of the appetizer mezze for an Arabic-themed dinner that I co-hosted recently with some pretty special people. They are also some of the best cooks I have ever had the pleasure to work with, and am trying to convince them to contribute something to this blog.

This is what Claudia has to say about Middle-Eastern eggs:

“Egg dishes are very popular throughout the Middle East. Beid, as they are called, received the full Oriental treatment. Hard-boiled and coloured yellow or brown, flavoured with cumin, coriander or cinnamon, they are sold in the streets with little cornets of rolled-up newspaper filled with seasoning to dip them in. Fried or scrambled, they are enhanced with flavourings of garlic, onions and tomatoes, lemon, vinegar or yogurt. The Arab omelette, eggah, is more like a cake. Thick and rich, it is not unlike the Spanish tortilla to which it is undoubtedly related through the Moorish conquerors of Spain. Did the Moriscos introduce the omelette to Spain, or did they bring it back to North Africa after the Reconquista? It does not appear in early Arab culinary literature, so its origin is still a matter for speculation.”

In Persia, this dish is called Kuku, and the first time I tried it was at a Persian feast a few months ago, made by Becky. It can be eaten hot or cold, and can be made in advance and warmed up again, which makes it very advantageous when cooking for a lot of people in advance, or going on a picnic. It is though, of course, much nicer on the day it is made, still a little crispy from the grill.

Here are the quantities that I used for mine, and it made enough for about 25 little squares.  Of course it does all come down to how big your frying pan is, you want the Eggah to be at least an inch thick, and bursting with filling, so that it is almost emerald green when you slice it.

12 eggs
1 bunch parsley
1 bunch coriander
½ bunch mint
5 spring onions
salt and pepper
1 tbsp olive oil, or clarified butter
½ cup milk (optional)
1 tbsp flour (optional)

Preheat the grill.

Wash and finely chop up all of the herbs, and finely slice the spring onions, using the green tops as well as the white parts. Break the eggs in a large bowl and whisk up until frothy. At this point you could whisk in the milk and flour if using. Mix in the herbs, and season.
Heat the oil in the frying pan, and add the fantastically green egg mixture when hot. Cook over a medium heat for about 5 minutes, or until the eggs have set up the sides. Put the frying pan under the grill (leaving the door open is fine) and cook for another 4-6 minutes, checking every 2 minutes. When it is done it should be burnished and crisp, and slightly springy.

Serve cut into wedges or squares.


Saturday, 26 February 2011

Quick Moroccan Carrot Salad

To make the perfect Moroccan carrot salad, toss still-warm coin shaped pieces of cooked carrot and chopped parsley in a dressing made from olive oil, lemon juice, a crushed garlic clove, 1 crushed dried chilli and an extraordinary amount of ground cumin.  This can also be made using cooked beetroot (thank you Shalem family), and is equally fantastic.  


The one issue with salads to make them the best they can possibly be is to take them out of the fridge enough time before you are ready to eat so that they can come up to room temperature.  Having things super-cold dulls the flavours (which is why melted ice-cream is so nasty btw) and then you might as well have just bought the salad from a shop.  Saying that though, if you want to try a really great Moroccan carrot salad, the one made by Yarden is pretty fantastic, and authentic tasting.

Saturday, 12 February 2011

Comfort food part 3 - Pomegranate salsa


This is comfort food in a different sort of way. It’s incredibly fresh and revitalising, and will generate lots of ego-boosting compliments.  I wont get into whether ego-boosting compliments is a reason to cook for people, it comes under the whole vanity project thing, and just gets depressing.  I’d like to think that I love cooking for people because I really like making people happy, and feeding them in a jewish-mother kind of way, but I cant deny that being told the food you make is delicious doesn’t make me feel great.  I seem to spend so much of my day with a cloud over my head, so every little helps I guess.  Part of the reason why this salad is great is that it seems to go with everything.

·     1 pomegranate
·     1 cucumber
·     3-4 spring onions
·     juice and zest of half a lime (oh santa please can I have a zester.  While peeling and chopping zest does show off my awesome knife skills, its not so efficient…)
·     handful of mint, chopped

Chop the spring onions and cucumber into small bits, making sure to use the green of the spring onion too.  I tend to cut the seeds out of the cucumber as I find them too watery and annoying, but I leave that decision up to you.  If you happen to have a hamster, save them a slice of cucumber and 1 or 2 pomegranate seeds.

Now I don’t mean to get all weird, but for me there is something incredibly feminine and slightly erotic about deseeding pomegranates.  Pomegranates have such a resonance with femininity through culture and mythology, representing fertility and a certain element of temptation.  I’m sure there are some interpretations of the Garden of Eden where the fruit is a pomegranate, and of course there is Persephone in the Underworld.  Somehow when deseeding pomegranates I feel incredibly calm, and feminine.  I’m sure this all makes me very strange, maybe I’ve just been single for too long.  I had a similar experience a few months ago when I was asked to fill up a very large urn for a reception at work.  It was so large that we had to use jugs, and all the water jugs we had were that very traditional amphora shape.  I noticed that I was pouring the water in a similar pose to the women in typical art nouveau or Aquarius imagery, and I felt incredibly feminine, and not in a betrayal of my gender empowerment kind of way or anything.  This is turning into a very odd post…

Anyway, to make the salsa, mix everything together, at least 1 hour before you want to eat it, so the flavours have a chance to settle.  And that’s it.  Some people find deseeding pomegranates quite tricky what with all the pith, but if you take your time and are methodical it should be fine.  Some suggest bashing them with a wooden spoon to get the seeds out, but I really don’t get this.  I have tried it and I cant say it made any difference, other than being messier and totally ruining the zen-like femininity of the moment.  And I’m not sure why the spoon has to be wooden.  You can also deseed over a large bowl of water, being that the pith is supposed to float to the top or something, but this then washes off some of the delicious juice bleeding out the cut sides of the fruit. Take the seeds out over bowl you are going to use, and be careful and it’ll be fine.  Just don’t wear a white shirt.

Proserpine.jpg
Proserpine: Dante Gabriel Rossetti (1828-1882). Oil on canvas, 1874